Slider

slide1

Drone Structure Scan - Derelict Cottage

Detailed 3D model of and old derelict cottage in Midvale.

slide2

Small Drone Mapping 101

The Aero Scout shares his experiences with drone mapping and 3D models.

slide3

Arthur River Mt Pleasant Kitchen - 3D drone structure scan

3D model of the heritage building Mt Pleasant Kitchen in Arthur River.

slide4

Chestnut Brae - Farm planning map in Nannup

Demonstrating how drone imagery can be used as a base for effective farm planning.

slide5

Drone Structure Scan - Heritage Lighthouse

Drone structure scan of the heritage South Mole Lighthouse in Fremantle.

A new Aero Scout - Walkera Tali H500

The new Aero Scout, a Walkera Tali H500 and it's Devo F12e controller in the field
I'm very excited to announce that a new Aero Scout has arrived, it's a brand new Walkera Tali H500 hexacopter. This is going to give me the ability to conduct aerial missions in hotter, higher and windier conditions than my previous quadcopter. It is also capable of carrying a greater payload, typically 600g, which means I can use different cameras/sensors such as a compact camera or a FLIR camera.

Hexacopters are exciting, and I believe, we'll see more of them as the multicopter drone industry develops. The main reason is that they are safer and the Authorities are keen to see safer drones being manufactured. The extra motors mean that if one motor failed (and theoretically even if two motors failed) then the flight controller would be able to maintain stable flight long enough for the pilot to bring the aircraft down for a safe landing. Not that quadcopters have a tendency to always fall from the sky, but with only four motors there is no room for a malfunction. Regular maintenance checks certainly helps, however some components are some small that a pilot is unlikely to spot any problems.

The other bonus that a hexacopter delivers is the ability to lift more weight. I'm looking forward to having more options on the size, quality and type of camera/sensor that I can use. For now that will most probably be a GoPro style actioncam on a 3 axis gimbal, however in the future I'd like to have a  FLIR camera for spotting and mapping temperature gradients or hotspots. A compact camera would be very useful for higher resolution maps and 3D models , you can purchase modified cameras (NDVI) that filter certain light waves to make it easier to determine plant health or crops. There's lots of new options now available for me to explore.

For now though, I'm just familiarising myself with the new airframe, it's very different to my last quadcopter the QR X350 Pro. It has alot more power, hovering with no payload at 25% throttle and is also a lot faster. I'll be spending a few weeks just honing my basic flying skills with this new airframe before I add a gimbal and camera and start running mapping missions.

First flight with the Tali H500 plus basic test FPV system.

A big thanks to Walkera for it's generosity in sponsoring the Aero Scout and supplying this air system at a discounted price.  I have always had a good experience with dealing with Walkera and own (and have owned) a handful of their drones, all of which are excellent and I treasure very much.

This has been another 'drone adventure' in aerial surveying, inspection and mapping by The Aero Scout.

March of the drones: 10 ideas that moved flying robots forward in 2015


Article by Nick Lavars published on GizMag.com

Drones have continued to capture our imagination in remarkable ways throughout 2015. Despite the thick layers of bureaucracy that outlaw commercial use in much of the world, fresh ideas itching to put the technology to use constantly come to the fore. Let's cast our eye over some of the more promising to emerge this year; a diverse list that includes everything from drones that deliver medical supplies to drones that can build bridges all by themselves.

Click here to read original article on GizMag.com .....

DJI P3 vs Walkera Tali H500

DJI P3 vs Walkera Tali H500
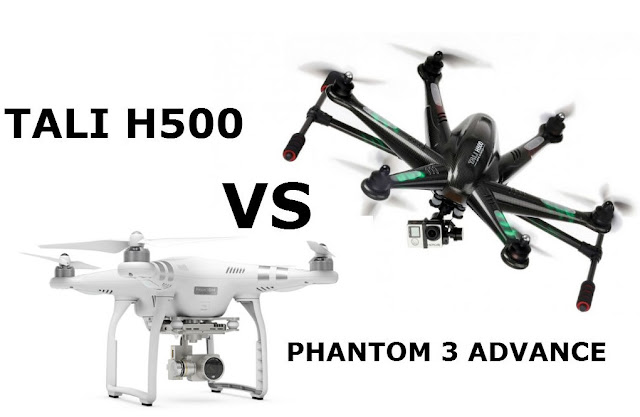
Lets compare the Phantom 3 to the Tali H500 for aerial 3D mapping
As you probably would have read in my previous post, I crashed/lost my Walkera QR X350 Pro, which I had successfully operated for over 18 months. Learning from my experience, I'm now wanting to replace this drone with something more capable. The number one consumer drone is the Phantom 3, that said there's some pretty good deals to be found right now on the Walkera Tali H500. I thought an 'informal' comparison between the two, written down in this blog, would assist me in my decision making and help me to arrive at the most suitable choice to fulfill my needs..

There's little doubt that the Phantom 3 Pro and Advance quadcopters are considered some of the best  aerial filming drones on the market right now and they are built by the largest drone manufacturer in the world DJI. Their level of sophistication and the integration of their systems is unmatched, they are brilliant, high end consumer drones.

The Tali H500 on the other hand is not as well known or popular as the P3. It's a hexacopter built by Walkera and has mixed reviews from users. Some say it's a dud but many others say it's a very reliable and flexible and still has room for growth and development as an airframe. It comes with the industry standard autopilot installed and a controller handset that has a built in screen for viewing live video and telemetry.  

See below my comparisons on these two excellent drones., but do understand that my comparison is from a 3D mappers point of view. My interest and passion lies in aerial surveying and post processing 3D map and model creation. Whilst this 'drone discipline' shares many attributes of aerial filming style of drone operations, it is also has some very different requirements. Do read on .......

Stability and safety

One of the main factors to my QR X350 Pro crashing was the hot, windy conditions. This has made me look for a larger, more redundant airframe such as a hexacopter. With a quadcopter if a motor fails then the aircraft will crash instantly. With a hexacopter, if one (and sometimes even two) motors fail then there is a very good chance it can still be controlled back to pilot safely.


P3 AdvTali H500
  • Four motors = no redundancy if component fails, quad crashes!
  • Excellent quality record
  • Ok stability in windy conditions
  • Six motors = safe landing if components fail 
  • Quality control has been an issue for some customers
  • Excellent stability in high winds

Payload

The P3 is all about integration and ease of use. The downside to this is that the user cannot swap the camera over for another. Being a quadcopter is is also very restricted in it's lifting capacity, somewhere around 200g is about all an airframe of it's size can carry.

The Tali H500 hexacopter on the other hand, whilst is not considered a heavy lifter, can lift much more than a quadcopter, more like 500-700g. The other factor is that because the airframe is independent to the camera, the Tali can 'swap out' it's payload anytime. The user can choose what gimbal and what camera he/she wishes to use. For a 3D mapper this means that a GoPro can be used, a modified GoPro with a specialised lens, or even a compact camera. It also means that a 2D or 3D gimbal can be sued depending on what is required for the mission.


P3 Adv Tali H500
  • Can't change payload
  • Around 500-700g payload
  • Change to a 360 gimbal with latest GoPro
  • Add a Walkera G3-S gimbal to carry Sony RX100 camera (professional quality filming and mapping) 


Flight time

The Phantom 3 has a slightly longer flight time than the Tali H500. About 24min is what I have read where the Tali H500 seems to be getting 18-20min depending on who you speak to. For mapping the advantage here is that a longer flight time means a larger area can be surveyed on one battery.


P3 Adv Tali H500
  • 20-25min
  • 18-20min

Flight planning

DJI aren't really in the business of aerial mapping and their Go app does not support mapping features, however there are other companies that have created software to plug into the P3 range to make them a very good mapping tool. When you combine the P3 with a mapping service such as Drone Deploy suddenly it does become much more capable and very close to an absolutely fully integrated airframe/post processing package.

The flight controller in the Tali is based on Ardupilot, an open source autopilot and it uses a mature and feature rich ground station program called Mission Planner. Mission Planner has many, many mapping tools and is considered the industry standard. There's not much that a pilot cannot flight plan in Mission Planner. Also there is a tablet version with most of the functionality.


P3 Adv Tali H500

  • Go app virtually no mapping features
  • Drone Deploy is a professional grade mapping solution that is compatible with the P3
  • Mission Planner considered industry benchmark for UAV flight planning
  • Excellent mapping features built in
  • Can be used on a desktop or a tablet version


Telemetry

The Phantom 3 range of quadcopters have absolute integration of systems, the camera and gimbal are not 'add-ons', they are part of the drone. With the DJI Go app you can view the status almost all systems including the waypoints planned and the current waypoint the drone is heading to plus this can be changed and new waypoints can be added in real time. The other major benefit of the P3 is that is uses 'Lightbridge' for the video and telemetry. This means that the pilot can view all of this information in HD and on an HD Screen such as a tablet.

The Tali H500 (in this configuration) does not report the same level of telemetry, but it does have live telemetry and analog video signal out to a range of around 1km. On  the screen integrated into the controller the pilot can view the drones altitude, distance from home, GPS lock and battery voltage, it does not report waypoints or progress.


P3 Adv Tali H500
  • HD video downlink
  • Full telemetry inc altitude, vertical speed, airspeed, battery status, GPS lock plus waypoints and progress. New waypoints can be programmed in real-time.
  • Analog video (out to 1km)
  • Basic telemetry inc altitude, distance, battery status and GPS lock.

Camera capability

For aerial filming the P3 is pretty darn good, a 12MP still photo and 4K at 60fps videos, certainly as good as a GoPro, also the level of camera remote control is un-matched. For mapping what really sets the P3 apart is that the images are automatically geotagged, this is because the camera and flight controller are integrated. The downside to this is that you can't separate the drone from the camera, you can't add a more powerful sensor or change the type of sensor (well you can but it's very expensive) so you are limited in what you can expand the drone out to. For most pro-sumer aerial photographers there would be little need to upgrade or expand, however I'm not interested in filming, I'm focusing on the still images.

The Tali H500 does not have this level of integration of camera and flight controller and the camera cannot be controlled remotely from the pilots controller or ground station. That said, there are ways to 'add' the EXIF data to a GoPro image post flight so that the images are geotagged. The advantage the Tali has over the P3 is that it can be retro-fitted with other cameras, most noteably the Sony RX100. The Rx100 is considered an extremely good compact camera and won many awards. For aerial mapping is has a 20MB sensor, this results is much higher detail and accuracy for the final 3D map.


P3 Adv Tali H500
  • Full remote camera control
  • Tilt ony gimbal control
  • No provisions for dual operator


  • No camera control for GoPro
  • Expandable to RX100 with limited camera control 
  • Full 360 gimbal control
  • Ability to be dual operated (pilot and cameraman) 

Price

I am in a fortunate position where I have contacts in the industry and I can get some good deals on both these airframes.


P3 Adv Tali H500
  • AUD$1800
  • Inc spare battery, backpack, gimbal, camera
  • Does not include tablet for viewing video and telemetry
  • AUD$1500
  • Inc spare batttery, case, 360 gimbal and camera
  • Inc handset controller with screen for video and telemetry


If my focus was aerial filming then I think the Phantom might have a slight edge over the Tali. It's limited with it's payload capability and for it's expandability, however it makes up for it in it's systems integration, it's HD video link and it's portability.

But for my interests though, in 3D aerial mapping, those features are not as important as the safety benefits and the payload capacity of a hexacopter plus the expandability that the Tali H500 will give me to help future proof the airframe and facilitate me increasing my skills.

For me, I think I'll be grabbing a Tali H500 very soon to replace my lost, but not forgotten, QR X350 Pro quadcopter.

This has been another 'drone adventure' in aerial surveying, inspection and mapping by The Aero Scout.

Last flight of the X350 Pro

Last flight of the X350 Pro
This is not my drone, I've just used this picture for emphasis, my drone is at the bottom of a winter lake.
Today was a sad day for The Aero Scout, I lost my Walkera X350 Pro in a wetlands lake. The short story is that it splashed down into the middle of the lake, never to be seen again due to a low battery .... the long story is as follows.

I knew this was going to be a challenging mission, the plan was to map a medium sized wetlands lake in Viveash. The area to be mapped was 120,000m2 (nearly 30 acres), a flight of 4.3km with over 160 images to be taken. Not only was it going to test my flight planning skills as I couldn't survey the lake with just one battery, it was going to need two, it was also going to test the post processing for the 3D map. I would need to plan for an overlap of images between the two missions so that the 3D map would be accurate, and I would need to be careful about the amount of time spent in the air because when flying over water there is no safe emergency landing zone. Clearly I hadn't anticipated all of the potential problems.

Last flight of the X350 Pro
The last flight of the X350 Pro ended with the drone ditching into the middle of this wetlands.
On the day the flying conditions were less than ideal, it was hot plus we had 25-35km/h winds blowing across the lake. I'd flown the X350 Pro in windier conditions before so I wasn't too concerned, however this lack of understanding of the affect of such wind on a battery would be one of the main contributors to the crash.

In my flight planning I had a 12min flight time, which usually gives me a 3min safety margin. In hindsight, I should have taken more notice of the wind and adjusted the flight time (in the field) to be a few minutes lower, to take into account the extra power that might be used by the drone to compensate for the strong winds and stay on the flight plan it was programmed with.

Last flight of the X350 Pro
Flight plan showing the first stage of the mission 

Last flight of the X350 Pro
Flight plan showing the second stage of the mission.
Another contributing factor to the crash, I suspect, was that my batteries were getting old and probably didn't hold as much capacity as they used to. This of course would reduce the flight time that drone was capable of flying. Without any kind of telemetry system built into the drone there was no way of knowing that the battery would not last the planned flight time.

I feel either a better instinctive analysis of the flying conditions that day or a more rigorous pre-flight checklist could have prevented this incident. Plus listening to my intuition and cutting the flight short when I felt something was not right would have also helped, all I needed was another 30sec of battery and I would have had the drone over the relative safety of dry land.    

Lessons learnt:

  • Take more notice of local conditions on the day of the flight and be prepared to modify flight plan to suit.
  • Add new points to my pre-flight checklist to ensure this analysis is done for every flight, regardless of conditions.
  • Test battery capacity more often and adjust standard flight time when necessary.
  • Where possible, only fly drones that have a bi-directional telemetry link to a ground station to enable real time monitoring of the systems. This will assist the drone pilot in making better decisions during the mission.
So I've had a setback but I'm not down. I'll re-group, learn from this mistake, purchase a new drone that has greater capabilities and safety features and will then continue with my journey. Stay tuned, I'll be back in a few months with more UAV 3D mapping missions.

This has been another 'drone adventure' in aerial surveying, inspection and mapping by The Aero Scout.

Creek Line - Photomosaic from video

Preparing for a simple waypoint mission with the Cheerson CX-20

Mission Summary

  • Goal: Create an orthomosaic (stitched map) from a video instead of a series of still images 
  • Tech: Cheerson CX-20 quadcopter drone, Mobius actioncam, Mission Planner, Microsoft ICE
  • Conditions: Early morning, sunny, nil wind
  • Outcome: Microsoft ICE had no problems creating a map for a video, very easy way of creating a 'strip' map. 

My Father purchased a Cheerson CX-20 drone this week and before sending it down to him I thought I'd do some checks and some tweaks to it, so that when he received it it was 'dialled in'.

As part of the testing process I decided to send it on an auto waypoint mission. This CX-20 does not have a gimbal (plans are to use it as a fun FPV machine for now) so I created a quick angled block to face the Mobius actioncam downwards. The idea was that instead of capturing still images I would just take a video of the ground below.

Microsoft ICE (Image Composite Editor) has a great little feature for creating a mosaic (panorama) from a video. I've been eager to test this feature out and felt the CX-20 drone with a Mobius would make the fine airborne platform for such a mission.

Creek Line - Photomosaic from video
Using Microsoft ICE to create a 'strip map' using aerial video from a drone
The flight plan in Mission Planner was simple, no need for a grid layout or calculating the image lap or how many images would need to be taken. Simply create a 'one way' waypoint and set the camera to record. I thought a river or pipeline would be a good way to demonstrate this 'strip map' style of aerial surveying, however a small creek line was the easiest (and safest) example I could find.

Creek Line - Photomosaic from video
A nice simple waypoint flight plan along a creek to then create a basic photo mosaic 
See a quick video showing how the mission unfolded and then see the results in a zoomable photo mosaic below.


The photomosaic is not as high resolution as some of the other missions I have completed using the 12Mp camera, however for a 'scouting mission' I think it works well. Note; click the top right of the image to view in full screen mode.


This has been another 'drone adventure' in aerial surveying, inspection and mapping by The Aero Scout.

Primary School - 3D Photomesh and Orthomosaic

Primary School - 3D Photomesh and Orthomosaic
3D model of a small primary school created with drone imagery

Mission Summary

  • Goal: Test 3D mapping for a site with more complex geometry (structures and trees)
  • Tech: QR X350 Pro quadcopter drone, SJ 4000 actioncam, Mission Planner, Recap 360
  • Conditions: Midday, sunny, nil wind, magpies swooping
  • Outcome: A single grid pattern for collecting images does not seem sufficient for such a complex site. 

With my new G-2D gimbal attached to the Walkera QR X350 Pro drone I headed to the local primary school (on a non-school day of course) to test my methodology against a more technical model, one with open flat areas, trees and buildings. I'm expecting to get much better results with the gimbal installed as it keeps the camera facing directly towards the ground, this helps in eliminating poor quality pictures that are taken during a bank or oscillation, which could degrade the quality of the photo alignment.

Primary School - 3D Photomesh and Orthomosaic
QR X350 Pro drone plus modified handset and camera ready for 3D mapping mission
As usual I did my flight planning in Mission Planner. The flight is not covering a large area (just under 5 acres) however because the smallest time lapse on the SJ 4000 camera is 5 seconds I need to fly the QR X350 Pro at a slower ground speed to get the correct lapping in the photos. This means I'm using most of my flight time (taking into account adequate safety and landing time) with this small area.

Using the 'grid' function in Mission Planner enables the drone pilot to more accurately prepare a flight plan so that there is optimal photo overlap. You can see from the image below, Mission Planner has predicted how often the photos should be taken and how much overlap that should result in. For this project, I think the vertical overlap was fine however after seeing the results I think the horizontal overlap could have been better.

Primary School - 3D Photomesh and Orthomosaic
Flight plan showing predicted image overlaps
The model below is produced using only 'medium' settings in Agisoft Photoscan as that's all my 4 yr old laptop could handle. Also I'd consider the imagery to only be of a medium quality from the SJ 4000 with it's 12Mp sensor, quality is degraded more as the 12Mp are spread over the extremely wide 170 degree lens.

Nevertheless the results I felt were quite good when kept at a reasonably low zoom, if you get in closer you'll find many problems with the shape and accuracy of the model. Apparently, trying to get accurate photogrammetry for surfaces such as water and building roofs is very tough. Also, the quality of the model has been decreased during the upload process to Sketchfab.

See the model uploaded to Sketchfab below.


I'm hoping to improve the quality of the final model in future with a tighter grid pattern as well as a cross pattern (grid in both directions) to get more overlap on the images, a higher setting during processing and an optimised model for uploading.

Microsoft ICE had troubles stitching the images together for this project. As yet I'm not sure why this has happened, perhaps too many trees or too many lines on the netball court which confused the algorithms.

Primary School - 3D Photomesh and Orthomosaic
Photo stitch produced in Microsoft ICE - didn't seem to work too well, especially around the netball courts
Autodesk Recap 360 really struggled with this project. I tried using the original 'distorted' images from the SJ 4000 camera with it's 170 degree lens AND I also 'de-fished' the images to flatten them out. Neither model was acceptable, extremely low quality and very poor accuracy, see screenshot below.

Primary School - 3D Photomesh and Orthomosaic
Autodesk Recap 360 had alot of troubles dealing with this project and the results were very poor.
This has been another 'drone adventure' in aerial surveying, inspection and mapping by The Aero Scout.

Alkimos Beach - 3D Photomesh and Orthomosaic

3D model of a section of Alkimos beach

Mission Summary

  • Goal: Explore environmental mapping applications with a small UAV
  • Tech: QR X350 Pro quadcopter drone, SJ 4000 actioncam, Mission Planner, Photoscan
  • Conditions: Midday, scattered cloud, gusty winds
  • Outcome: I was very happy with both the 3D model and the orthomosaic, flight planning in the field was also an excellent experience. 

I wanted to test creating a 3D mapping model of a coastal dune/beach area. Environmentalists and research groups would use this technology to monitor coastal erosion, or sea levels over time by comparing two or more models of the same strip of beach.

Conditions were tough, the sea breeze was in and the little Walkera QR X350 Pro quadcopter/drone had to deal with 15km/h winds, which it handled very well, plus with the G-2D gimbal stabilising the camera it made little to no impact on the quality of the images taken.


I wasn't sure which part of the beach I'd be surveying so I took my laptop along with Mission Planner into the field and planned my flight onsite. This worked very well as it was great to be able to look for obstacles and choose the most 'appropriate' part of the beach to survey and map rather than guess, which is what I've previously done when flight planning from home.

Mission Planner does a great job at predicting the amount of photos that will be taken and overlap based on the planned height and speed of the drone and the type of camera being used.

Flight planning in the field using Mission Planner
Here is the finished model, produced in Agisoft Photoscan and uploaded to Sketchfab for easy viewing.


Here is a stitched photomosaic produced using Microsoft ICE. You'll see that what it lacks in 3D it more than makes up with it's high resolution. Click on the image and zoom in on details.

This has been another 'drone adventure' in aerial surveying, inspection and mapping by The Aero Scout.

Small Construction Site - 3D Photomesh and Orthomosaic

Small Construction Site - 3D Photomesh and Orthomosaic

Mission Summary

  • Goal: Create a basic 3D mapping model and 'stitched image' orthomosaic.
  • Tech: QR X350 Pro quadcopter drone, SJ 4000 actioncam, Mission Planner, Recap 360, Photoscan
  • Conditions: Morning, sunny wilth nil wind
  • Outcome: Whilst I could create a 3D model and an orthomosaic based on the images taken from the drone, the results where only of low/medium quality.

After a long break from mapping missions (12 months) I'm back with a slightly upgraded kit; the G-2D gimbal for the Walkera QR X350 Pro quadcopter/drone should allow me to create better quality orthomosaic and 3D models for UAV mapping.

The first project I thought I'd test the new gear on was a small construction site right next to the large field I usually fly in. I felt it was an excellent first project as the area is clear of objects, I'm familiar with the flying conditions, it's mainly flat with only a couple of topographic features but it still had a couple of small structures, mounds of dirt and equipment that I could test the accuracy of the model with.

Small Construction Site - 3D Photomesh and Orthomosaic

As a basic 'ground truthing' exercise you can compare the above image to the model below. You'll see that there is some slightly higher ground to the right, a few trees, plus a couple mounds of dirt that are roughly the height of the construction office. There's also a few perimeter fences around the site office and equipment.

Flight planning was done using Mission Planner, I just love how comprehensive yet intuitive this program is. It has tools to simply draw a polygon around the area you wish to survey, then based on the height you plan to fly and the type of camera you are using it plans the grid pattern that the drone will fly, this gives the best result for overlapping images. It also displays a summary screen showing the size of the area, the expected flight time, number of photos to be taken and much more.

Small Construction Site - 3D Photomesh and Orthomosaic

Here is a screen capture of my laptop showing the model generated from the photos. It shows each 'camera location' confirming the overlap that Mission Planner predicted. It also gives the drone pilot other summary information such as the area surveyed, the number of photos to be taken and flight time, very handy for deciding if it will be within safety limits.

Small Construction Site - 3D Photomesh and Orthomosaic

The results for the model created in Agisoft Photoscan are not bad. You can see that the terrain has been accurately re-created, for me, the main let down with this model is the quality of the site office and equipment. That said, my laptop can only handle creating a 'medium' quality model so perhaps they would look better if produced on a higher setting.


Compare the model above, that was produced using Agisoft Photoscan to the below model produced in Autodesk Recap 360. The Autodesk is easier to use, you simply upload your images to the Recap 360 account and all the processing is done 'in the cloud' however there are very little options and settings that can be changed.

Small Construction Site - 3D Photomesh and Orthomosaic

Below is a 'stitched' photomosaic produced in Microsoft ICE, the program takes all the photos and stitches them together to create a large image of the area. The difference with this to the 3D models created is that usually the resolution and detail when zoomed in is much greater. Check it out below by clicking on the image and then zoom in.

Small Construction Site - 3D Photomesh and Orthomosaic

This has been another 'drone adventure' in aerial surveying, inspection and mapping by The Aero Scout.

Safety First

Safety First


Even though I am not a commercial UAV pilot, I still like to conduce myself in a manner that is both safe and professional. Whenever I am planning or conducting a 3D mapping mission with my drone, I like to use this set of guidelines.

Whilst the brochure above is produced by RPAS Training Australia, these are still guidelines set by the Australian Civil Aviation Safety Authority (CASA).

Lake Ballard - Aerial Filming

Lake Ballard - Aerial Filming

Family camping trip to Lake Ballard to see Anthony Gormley's 'Inside Australia' meant that Jas had to take his Walkera QR X350 Pro along to use it for some FPV quadcopter flying and grab some sunset shots .... hope you enjoy. A big 'gday' to Gill and Helen who we met at the lake and shared a wonderful sunset with.