Slider

slide1

Drone Structure Scan - Derelict Cottage

Detailed 3D model of and old derelict cottage in Midvale.

slide2

Small Drone Mapping 101

The Aero Scout shares his experiences with drone mapping and 3D models.

slide3

Arthur River Mt Pleasant Kitchen - 3D drone structure scan

3D model of the heritage building Mt Pleasant Kitchen in Arthur River.

slide4

Chestnut Brae - Farm planning map in Nannup

Demonstrating how drone imagery can be used as a base for effective farm planning.

slide5

Drone Structure Scan - Heritage Lighthouse

Drone structure scan of the heritage South Mole Lighthouse in Fremantle.

Quarry - 3D Photomesh

Quarry - 3D Photomesh
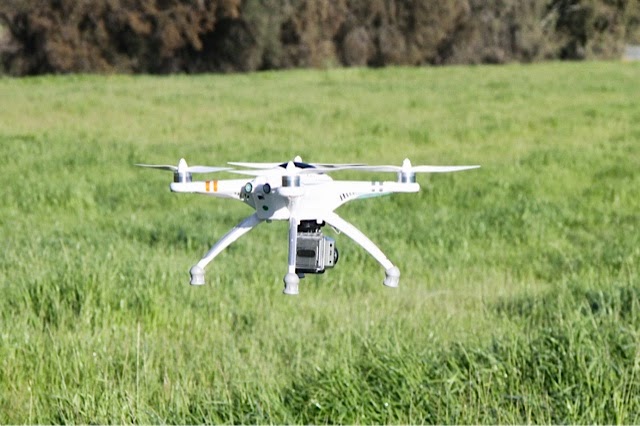
QR X350 Pro and gear ready to create a 3D photomesh of the quarry wall 
This is my latest attempt at creating a 3D photomesh using the QR X350 Pro drone, SJ4000 Actioncam and Autodesk ReCap 360. This one was done in the Gooseberry Hill National Park at Stathams Quarry. 

Flying conditions were tough on the day with plenty of turbulence around the face of the quarry and getting 'still' images was virtually impossible. In this situation a 2D gimbal would have been very handy and I'm sure the captured images would have been of better quality. Another challenge close to the quarry was getting a GPS lock, I had to take the QR X350 Pro out into the middle of the quarry before it could retrieve enough satellites to fly reliably.  

Even though the flying was tough, I am still pleased with the result. The mesh seems quite accurate and has managed to re-create all of the faces of the quarry wall. The results are significantly better than my previous attempt on the pump station. The images are clearer,  seem higher resolution and ReCap has managed to stitch them together more accurately this time. I'm not sure if it was the subject of the mesh (the wall), the lighting conditions or the new camera I'm using.

For the next project I am looking forward to learning how to take the mesh out of Autodesk ReCap 360 and into another program where it can be put to use.

See the results of this photogrammetry mission below;


Quarry - 3D Photomesh
Looking into the mesh

Quarry - 3D Photomesh
Camera angles that the mesh was created from
This has been another 'drone adventure' in aerial surveying, inspection and mapping by The Aero Scout.

Pre-Flight Checklist

Pre-Flight Checklist

Pilot error would easily be the number one reason for any drone incident/accident and 'GPS fly away' is an incident that plagues quadcopter pilots. I've had my share of close calls and most of them have been caused because I was not thorough enough with either my airframe setup or pre-flight checks.

It's hard to stay disciplined when your mates at the flying field simply turn on their RC models and throw them into the air, which is the norm for hobby flyers. However with GPS drones that use sophisticated flight controllers they need time to startup correctly and complete their own systems checks.

In order to keep myself on track, I created a pre-flight checklist that I consistently use for every UAV mission. See an example of the checklist I use for my QR X350 Pro drone here.

Pump Station - 3D Mesh (V2)


Pump Station - 3D Mesh (V2)
QR X350 Pro vantage point on Pump Station photogrammetry mission
Today I returned to the Pump Station to try my luck on another photogrammetry mission. It was overcast so I thought it would make a better day for aerial photos. they certainly were better than the first attempt, much less shadow and sun glare. I was much methodical in taking the photos this time and I followed the quad around the pump station to make sure it was aligned for each shot.

Autodesk ReCap 360 is very easy to use. Follow their guidelines when taking the photos, upload them to site, sit back and wait for the render to finish. You can go back into the interface and manually manipulate the images to realign any that could not be meshed automatically.

That said I feel that I am still only getting 'basic' results. The mesh is very messy under the eaves of the roof and this causes problems with the textures on the walls. I am using the free version of ReCap 360 and it limits the total amount of images it will import for each project to 50. I'm not sure if this is too few (even for a small project like this) or whether I need to persevere with refining my methodology, choosing an easier subject to model and stabilise the camera more.

I'll continue to see what I can do using the free version a little longer before looking at seeing what the paid version can do to improve my results.

See the video of the mission here;


This has been another 'drone adventure' in aerial surveying, inspection and mapping by The Aero Scout.

Park Ride - Aerial Filming

Park Ride - Aerial Filming
Park ride with the QR X350 Pro
Again it was a glorious warm winters evening so Stella and I headed to the park. Whilst there, we both enjoyed some riding and aerial filming practice with the QR X350 Pro. See the video here;


Pump Station - 3D Mesh

Pump Station - 3D Mesh
Pump Station photo mesh taken created using Autodesk Recap 360
I stumbled across, what I thought would make, a simple photogrammetry project today, a sewage pump station on the outskirts of the local wetlands. The reason I thought it would be easy is that it is a simple shape and it is surrounded by clear space making it easy to fly the Walkera QR X350 Pro around it.

I turned out to be tougher than I thought. For starters getting the quad absolutely stable is a tough job in even the lightest of winds and watching out for the right lighting is also tough, it was a very sunny day and when the camera was facing towards the sun the photos are all under-exposed. The other challenge is understanding when the GoPro will take a picture, I have it set on a 2 second timer so for each placement I have to wait five seconds or so to make sure I have at least one or two good shots in.

I'm yet to get stuck into all of the functions in Autodesk ReCap 360 to be able to 'manually stitch' photos that couldn't be processed etc. For my second attempt I'm pleased with the results.

Anyway, it's all good fun experimenting and slowly getting better. I'll be sure to go back and try again, next time I'll pay more attention to my methodology and the lighting conditions.

Pump Station - 3D Mesh
Pump Station photogrammetry mission using my QR X350 Pro and GoPro2 (hard mounted) 
This has been another 'drone adventure' in aerial surveying, inspection and mapping by The Aero Scout.


Sunday @ the Woody - Aerial Filming

Sunday @ the Woody - Aerial Filming
QR X350 Pro with hard mounted GoPro 2
Sunday morning flying with the boyz at the Woodbridge flying field.

Gazebo - 3D Mesh


Autodesk Recap 360 photomesh of the Maylands gazebo
Harry and I popped out for a lunchtime adventure today ..... picnic bag and quad in tow. I spotted a cute little park that had both a playground and a gazebo by the water that I thought would make a nice photogrammetry project. It was a little windy (10knots) and was hard to keep the quad steady, but at least we ended up with a photo mesh. It's only a basic result but it gives me something to work from and hone my skills controlling the quad in order to get well framed shots. Here is my first attempt at photogrammetry using my Walkera QR X350 Pro, GoPro 2 (hard mounted) and Autodesk Recap 360.

QR X350 Pro first photogrammetry - the gazebo  

Harry  stretching up before the big photogrammetry mission

X350P - GoPro maiden

X350P with GoPro 2 hard mounted
Meet Cam and Russ at Ascot this evening to try out some aerial filming. Cam bought along his GoPro 2 and wasted no time 'sticking' it to the bottom of the Walkera QR X350 Pro. Check out the rookie videographer and the 100% un-stabilised footage of the fun we had below.


X350P - Mode testing

Testing the different modes on the QR X350 Pro
Tonight was a good night for testing the three different (pre-set) modes on my Walkera QR X350 Pro. The three modes are;

1 - Manual; in this mode it is all up to you to control everything about the quad, pitch, roll, yaw and altitude It's a tricky mode to fly in, however it also gives the operator more freedom as bank angles are not restricted and the speed you can fly the quad is much greater.
2 - Position hold; this is a stabilised mode where you can still fly around however the quad will try to hold altitude and is restricted in it's bank angle and therefore speed, if you let the handset sticks go the quad will auto level. This is excellent for learning to fly or for taking aerial footage.
3 - Return to Land (RTL); flick the switch for this mode and the quad will automatically (all by itself) stop whatever it is doing, hover, climb to a preset height of about 10m and then slowly bring itself back to the location that you first turn it on at, it will then slowly descend and land .... it's amazing to watch!

See video below of the three different modes in action.

X350P - Sunset takeoff


QR X350 Pro ready for a sunset flight 
It was a gorgeous evening so I just had to get out for a training flight at one of the nearby flying fields. Check out the video below.


X350P - First flight

I couldn't wait any longer for the weather to clear up or for me to have the time to get to the flying field so I decided to have my first flight in the backyard. Some of the rationale was that if it did try to fly away all by itself at least it would have a good chance of hitting a tree, post or piece of play equipment!

I was quite nervous, but felt I had prepared well enough by watching a bunch of YouTube videos (Thanks Bo @ FPVGuy.com) and reading the Walkera quick start guide a few times.


New Direction

Walkera QR X350 Pro with Devo 7 handset
After many weeks of frustration trying to get the auto-tuning to work on the Skywalker X5 I decided to take a break from it all. I was not enjoying the constant tweaking/testing cycle and longed for a complete working kit with full APM functions.

I decided to look into a new direction, multicopters and in particular the RTF versions that have just recently entered the market. So I purchased a Walkera QR X350 Pro, because it has a great flight time (25min) and also uses the same flight controller as the Skywalker X5 (APM).

Whilst the quad won't be able to cover the same mapping area as the fixed wing, it's going to be a more flexible platform and allow other styles of mapping/photogrammetry, this I am very excited about.

More auto tuning


After my last adventure discovering the in's-and-out's of auto-tuning I contacted my mate in Canadia DWGSparky for advice on taming the Skywalker X5 and getting it 'tuned'.

As always he had lots and lots of advice, I soon learnt that the auto-tuning was one of the most important parts of setting up the APM functions and that sometimes they can take quite a while to get right.

Armed with my new found knowledge I set back to the flying field, this time with Stu to help monitor Mission Planner.

Unfortunately we had the same troubles as last week. After many tests the auto-tune mode of virtually unresponsive and the RTL would send the X5 into a terminal death dive.

Frustrated I gave up flying for the morning and sat back drinking my iced coffee watching the other boyz fly. At least the scenery was calming.


Auto tuning

It's been nearly two months since I last flew the Skywalker X5 (been busy working on the house and garden) so I took her up for a re-familiarisation flight to see how rusty I was after such a long break. It was like riding a bike, no problems at all. :)


Now that the airframe tuned for basic RC it's now time to work on the auto-tune function to get the APM working efficiently. So today the task at hand was to get started on the auto-tuning function.

I started by assigning three flights modes, manual, stabilize and FBWA to see how they performed. Stabilize seemed to work quite nicely, it took the edge off flying the 'squirrelly' X5 and the FBWA mode seemed to work with the bank limiting obvious. Once these flight modes were tested I bought her in and re-assigned the stabilise mode to Auto-tune and FBWA mode to RTL.

Thing's didn't go too smoothly this time around. The auto-tune mode was extremely tough to get any response from, when I changed into the mode the X5 became extremely sluggish and almost impossible to manoeuvre. I moved the control surfaces hard left, hard right and it took several seconds before the X5 could turn around. The speed at which the X5 flies across in front of me meant that I could only attempt an auto-tune mode for about 12-15 seconds before turning it off to do a 180 and fly back in the other direction.

I really wasn't sure if I was getting any 'tuning' done so thought I'd see what happened when I flicked to RTL. The first time I tried it seemed to work, with the X5 changing direction and heading over roughly to where the RTL point on the Mission Planner was set, however it overshot the position, did a slight turn and started to fly away. I panicked and switched back to manual mode.

When I tried RTL again instead of heading to waypoint, the X5 pitched up, did a hard turn and then nosed hard down and increased throttle. I switched back to manual immediately and bought her in.

It seems that auto-tuning was going to be a little tricky.

First flight with APM


First flight of the Skywalker X5 with APM
Today was the big day, the first test flight for the Skywalker X5 with the APM mounted ..... and it all went superbly! I didn't jump in the air once all the tests were complete, but I did let out a loud WOO HOO. Smiling face with open mouth

Firstly I took her up and re-trimmed her in manual, it was a little gusty but got there in the end. Once I was happy with the trims, I tested changing mode to 'stabilise' when I was flying into wind and at altitude. All went fine, there was some difference and she felt like she was definitely tracking a little better. After that I tried 'FBWA' mode and found that one a little un-nerving. The Skywalker X5 is a squirrely thing to fly and when I suddenly didn't have as much control authority as I am used to I got a little scared. Anyway the bank seemed to stop and hold at somewhere around 40 degrees I'd guess and similar with bank, so FBWA seemed to work.


All the gear needed, X5 with APM installed, laptop with Mission Planner, 9XR Tx and backpack
I then bought her in and had a break while Harry and I checked over everything. By this time Stu and Paul arrived at the field so at last I had someone who could monitor the Mission Planner while I flew. I changed the FBWA mode to RTL and took her out for another go. Oh, I made sure a new home point was correctly placed in the Mission Planner and loaded onto the APM.

The launch was a little scary (its ok I was expecting it) as I had just trimmed her for level flight. It was just a slight nose down launch until she got about a foot off the deck then she powered away and climbed just fine.

We went through the first 2 modes again to make sure all was right, and Stu was calling out the G/S, altitude, flight mode etc every so often, all seemed to be working well as what was happening in the air correlated with what was on the laptop screen. The Mission Planner did seem to freeze a few times, but within a few moments came back to life, still not sure what that's about. The time was right so I clicked the RTL (again on and upwind leg and at altitude) and guess what?...... she took herself back over to the position I had marked on the map and started circling! Absolutely exhilarating to watch but again a little un-nerving when you don't have to be hyper focussed on keeping the flying brick airborne. It was only a quick RTL test I didn't have the courage to let it go on for long and shortly after I decided to bring her in, "quit while I am ahead" is exactly what I said to myself!

A massive thank you to David DwgSparky from DIY Drones for all his guidance with setting up and tuning the APM, I really don't think it would have been a success without his help and also to Stu for his expert monitoring.

I'm guessing I'll be doing a few more flights just like this one to get comfortable with the different modes and confident the RTL is going to work correctly and for extended periods of time. This is turning out to be a very exciting adventure.


My trusty co-pilot Harry helping to do pre-flights

Saturday morning flying fun

The Skywalker X5 is still 'in the shop' while I'm setting up the APM and bench testing so no flying for her today. However that didn't stop us heading down to the field for a Saturday morning fly and some family fun.

Paul and Stu 'pre-flighting'

The boyz with one of Paul's AXN Cloudy 's canopy (with chunk out of it)  that has a habit of popping off on launch.
Keeping Poppy the dog well exercised

Stu with his new launching technique
Stu's sticker on Paul's AXN Cloudy
Haz and Max flying Dusty

Indian file on the way out of the flying field


Mounting the APM, config with 9XR and bench testing


APM mounted 270 degrees off Skywalker X5 axis
I installed the APM into my Skywalker X5 a few days ago. There was a little 'faffing' around getting it all to fit the rear bay of the X5, but in the end it seems to fit well. I have it mounted to the airframe on a small plywood board, the APM is stuck to the board using the 'anti-vibration' sticky foam pads.

So this morning I took some time to go through the initial setup of the APM, I found it quite straight forward, although I feel the documentation is still a little 'light on'.

First step was to hook the Rx into the APM. Usually I have throttle on Ch1, elevator Ch2 and Aileron Ch3. However APM needs throttle to be on Ch3 so I had to do a switch around, no big deal but I couldn't find anywhere on the APM Wiki that actually tells the user to do that. Is it common to have throttle on Ch3 and it's just me that is doing it all 'arse about'?

Initial Setup
The latest version of Mission Planner has nice little 'initial setup wizard', once I had my Rx talking to/through the APM I clicked on that button and ran through all 16 steps. I had to calibrate the accelerometer, the compass, the radio, set the flight modes, let it know what extra sensors where installed and more. You'll see a photo of my 9XR and the settings I have for it below, I hope it saves you some time.

The radio calibration proved to be the toughest to get just right ....

Flight Modes
Next I went through and tested the flight modes. For the first test I thought that I'd use manual, stabilise and FBWA modes. If all goes well with them I'll go to mode 'RTL' and then to 'Auto'. Manual mode worked just fine, all inputs were as they have been for the last few weeks. The 'stabilise' mode however was giving me some 'curley' results. The manual inputs (when in this mode) were just fine however the actual stabilisation was completely off ..........

PID's


Failsafe


Fully loaded circuits

Coming in for a landing with the Skywalker X5
Now that I have the Skywalker X5 at it's predicted full weight for UAV work (using ballast) I thought it was time to take her our for some circuits to trim her up and get her dialled in.

The new control rods and connections worked a treat, very responsive and I can definitely notice the difference.

Check out the video below;


Replacing the control rods

The new updated control rods and connections for the Skywalker X5
I have been chatting with David from Air-Vision-Air this last week or so and his biggest tip for setting up the Skywalker X5 well was to replace the control rods!

So I placed my order with HobbyKing, waited a week for it to arrive and today had the time to both switch over the plastic gear servos for new metal ones as well as upgrade the control rods and connections.

I may have gone a little overboard, it all seems to be very heavy duty now compared to what I originally had. That said, geez the control inputs are rock solid now, there is absolutely no 'slop', which is what I had previously. I'm looking forward to taking the X5 out now and seeing the difference.

Thanks David for your advice.


Rock solid control input now, now 'slop' between the servo arm and the elevon control horn

Loading her up

The 'mockup' of the Canon S110 camera I plan t use.
I felt it was time to load the Skywalker X5 up to the final AUW I expect for when she is flying with APM and camera. So today I created a mock camera out of coreflute, the same size and weight as the original and have mounted that in the Skywalker X5. It's AUW is now 1.25kg.

The 'mockup' camera fitted into position ready for test flight.
It was an anxious first launch now that she was an extra 200g heavier. However it didn't seem to make too much of a difference. We had an 8 knot wind from the SE but all went well.

I took her up for a couple of circuits to trim the Skywalker X5 out at the new weight. It didn't really need much at all, I'm guessing because I balanced her correctly before flight. A couple of extra hand launches and landings to check everything was right and I was happy.

One thing I did notice was that the Skywalker X5 was more stable in the air this time, she wasn't being bounced around like before. This extra weight could be a good thing.

The Skywalker X5 was super stable with the new AUW of 1250g
I only took her up for a few quick circuits as I had Harry with me this morning so we had 'other' more important things to do like run around the paddock and explore the creek line!

All up the Skywalker is launching and flying very well with a new AUW of 1250g.

Harry uncharacteristically shy during a photo shoot


Basic aeros - testing the flight envelope

Stu and Jas prepping for the flight


Under Stu's guidance I thought I'd run through a few 'basic aeros' today, both to increase my flying skills and test the flight envelope of the Skywalker X5. I have no carbon fibre spars reinforceing my wings so I was interested to see just what they could take.

I wasn't sure how we were going to go as I have very minimal throws on my controls (20%) and I haven't setup dual rates.

Doing a loop was no problems at all, she handled that just fine. However I tried doing a roll and that didn't work, all I got from that was a wingover and a steep bank towards the ground! I might try again next week and this time I'll program in dual rates and test the high rates out.

So I called it quits and decided a few loops would be good enough for me, a successful morning of flying is a tick in the box for me.

Setting up for a loop with the Skywalker X5

Round and round we go

A stiff hand throw and the Skywalker X5 takes flight 
Hand launching the Skywalker X5 has proved to be the toughest part of testing so far. Getting a reliable launch is a real challenge, she doesn't handle crosswind well and needs a dang hard throw to get her moving.

So today I thought  I'd take the X5 up for a series of circuits, to get as many hand launches in as possible. The drill was launch, do a couple of circuits, land and then repeat. This not only gave me plenty of practice at what is required for a successful hand launch, it also gave me an opportunity to hone my landing skills.

The real gem that I discovered was that after about 20min of running time the batteries started to run lower and hand launching became very dangerous because the takeoff thrust was noticeably less. Not that this is likely to happen in a 'real world' situation, but it's an excellent piece of flight performance data to know.


It wasn't the best landing of the day!


Beefing up the motor mount

The beefed up motor mount just prior to installation
I've had one too many 'poor launches' which have sent the Skywalker X5 cartwheeling across the field, this has resulted in the top screws being ripped out of the motor mount!

The broken Skywalker X5 motor mount
I guess it was inevitable, whilst the bulkhead for the motor mount glues well to the airframe, the bulkhead it's self is only a thin piece of ply. I expect only one or two screw threads to be gripping the ply and the rest are just sitting in the foam.

Anyway, I decided to 'beef' it all up with a set of longer screws, wall plugs and metal washers and have glue four wall plugs into the foam and have used longer screws.

Hopefully the combination of the new beefed up motor mount and successful launches in future will mean that I have no more problems.

The components used to reinforce for the Skywalker X5 motor mount 
Wall plugs, longer screws and metal washers, all part of the new motor mount

Stall and spin testing

Pulling the Skywalker X5 up into a stall to create a spin!
Today I had scheduled to do some more flight testing, I needed to see how the Skywalker X5 would behave in a stall and spin. This would be my first time ever testing a model aircraft in a spin!

Overall I was pretty happy with the testing for a couple of different reasons.

Initially I took the X5 up quite high and then started throttling back and giving her up elevator until she stalled. Most of the stalls were quite mild and I could hardly notice much more than a slight nose drop, I was happy with the results.

Next I tried a stall at a lower altitude as well as on a downwind leg, this is where things turned a little pear shape! Yep she stalled alright and she spun, quite hard, what made things worse was that it caught me by surprise, I panicked and instinctively pulled up on the elevators hoping to pull her out of the spiral dive ..... you can guess what happened next can't you, yep she spiralled all the way to the ground head first, POP!

When I went to investigate the damage I was pleasantly surprised, a very slight crinkle in the nose but that was it. I did a five minute check over everything and decided it was all ok and hand launched it back into wind, no worries she took off like a dream. The X5 is one tough mudder!

So, I had received my wake up call and luckily had been given and second chance. Undeterred I took the X5 but up to altitude and induced a series of full spins and recoveries, this time keeping my cool and using the correct spin recovery technique. I have the X5 with a forward CoG so the technique for me was simply let go of the controls, within one full spin rotation the X5 had built up enough airspeed and had broken herself out of the spin, all I had to do was pull up.
 and the recovery was complete.

I continued with the spin recovery practice for a good ten minutes, entering the stall and then a spin  and then recovering. Sometimes I even held the spin for a good three, four maybe five rotations (just to see how she would handle it) before starting the recovery procedure. I declared it a successful testing session and bought her in. I haven't built up the courage to try a low level spin again yet but I will try one again soon.

Next on my list for the flight testing is basic aerobatics, you never know I may need to call on my newly found spin recovery skills then.